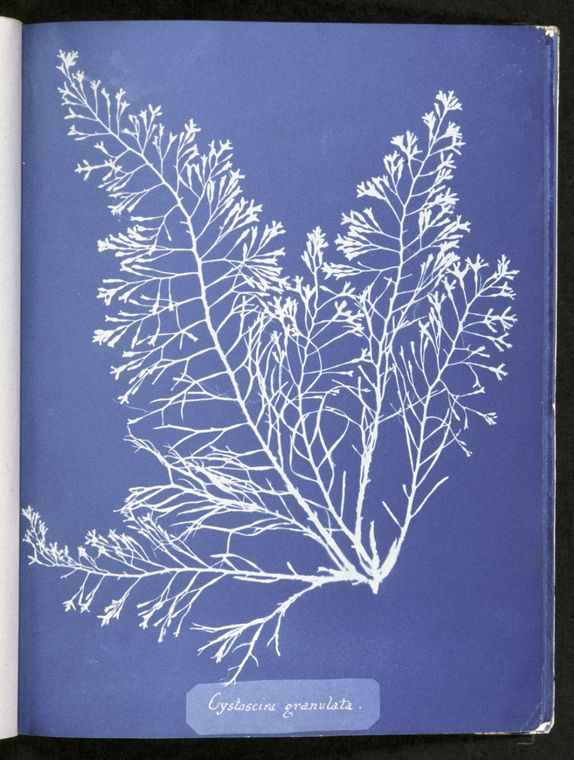
A few months ago, it was Anna Atkins’ 216th birthday. Do not pretend you know her, her name did not quite survive in notoriety all these years. She was a great scientist: at the London Botanic Society, as one of the first women ever admitted, she documented and illustrated biology research works and assembled herbariums that are still considered as masterpieces of biology. More importantly for us — even though I like biology — Anna Atkins was the first to publish a book containing photographic images. As a friend of the photography pioneers of that time (William Fox Talbot and Sir John Herschel who invented cyanotype), she was the first to use this new technique around 1840 in order to create negative reproductions of plants and algae – cyanotype photograms.
Cyanotypes are unique in the way that mixing two non-toxic chemical compounds results in a sensitive solution, that transforms into Prussian blue pigments when exposed to ultraviolet rays. That color that I find so pure and powerful, the one that Vincent Van Gogh used for his Starry Night, was too intense for photographers. After a while, and following new and emerging photographic techniques like the Daguerreotype, people chose black and white over blue and white. However, considering its low cost, it was extensively used for blueprints by architects and engineers in the 1950’s.
The good thing about cyanotypes is that they last a long time. Anna’s prints are in the same condition and just as vibrant more than 200 years later. Non-toxic, cheap, easy to make, long storage life, beautiful blue, was there any reason why I should not have tried it? If you want to give it a try, do not hesitate a second, it is really easy and fun. Here is how it went for me:
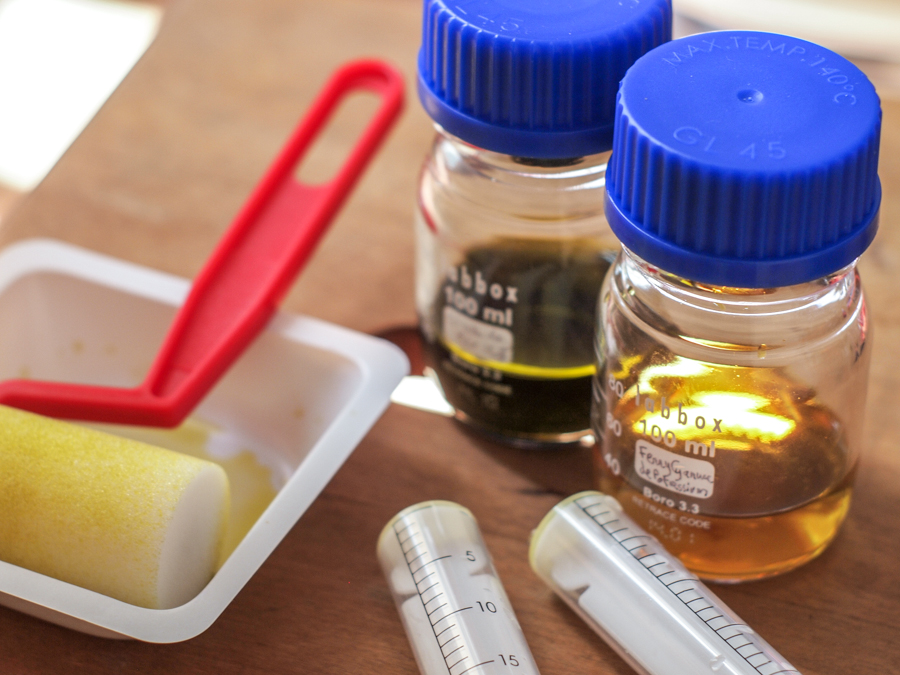
First you need a few elements. All chemicals can be found on chemistry websites without specific restrictions.
- Ammonium iron citrate
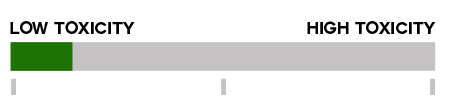
- Potassium ferricyanide (cool name but non-toxic — too bad)
- Paper or any porous material
- Plastic Syringes (two to avoid contaminating your solutions)
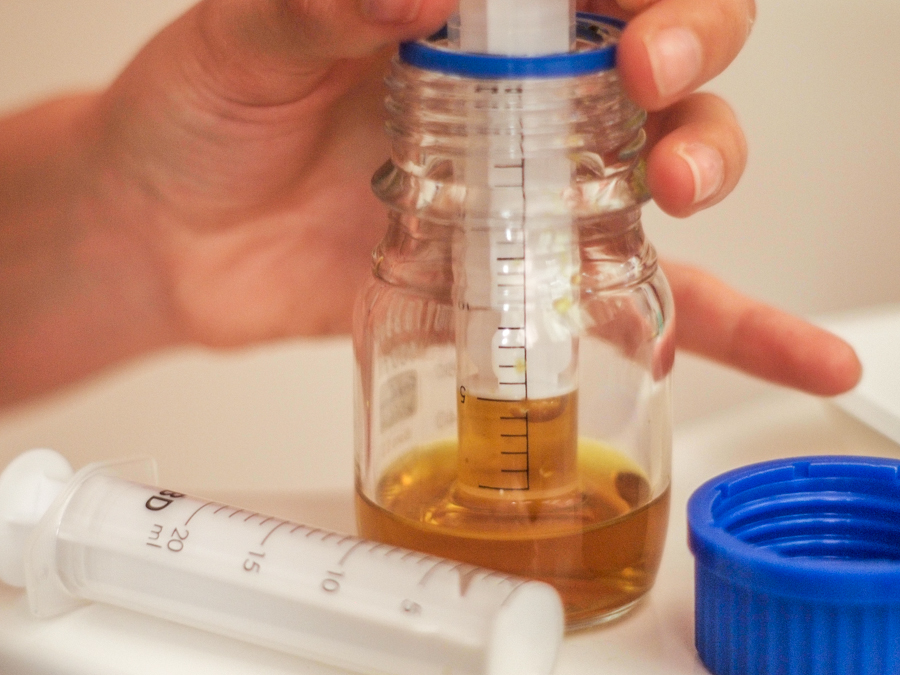
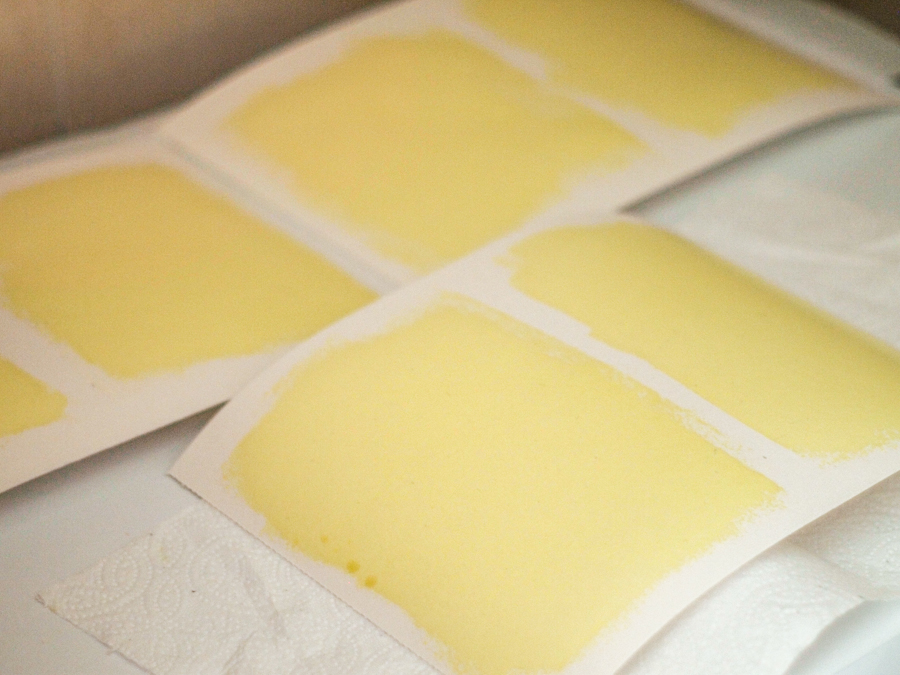
Mix 12,5 g of ammonium iron citrate with 50 ml water in a flask, 6 g of Potassium ferricyanide with 50 ml water in another flask. Here you go, your solution will keep for a few weeks. Then, you have to mix 5 ml of each solution (gives me enough to paint 2 full sheets of paper). The two chemicals react to form a UV sensitive yellow-ish solution, that you spread on a porous surface, such as a sheet of paper (also works with cardboard, cotton, wood,…). If paper it is, pick a rather thick one as it will be soaking for a few minutes in water (I used watercolor paper). This operation should be performed away from the sun (a dim bulb is okay though). Let the paper dry. Meanwhile, you can print your favorite photo in negative on a transparent sheet.
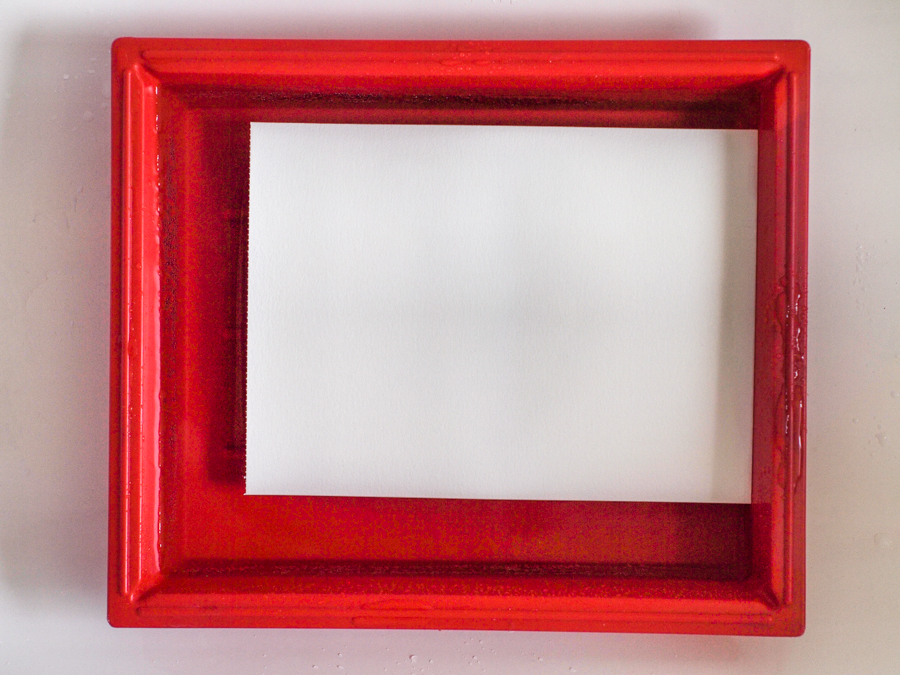
Once dry, the paper should be placed on a flat surface, with the negative sheet directly on the sensitive surface, covered by a glass to uniformly press. The glass I use comes from an old frame I do not need anymore. Then, put the setup in the sun. The UV will react with the exposed parts of the treated paper. The exposure time varies on the clouds, the season, the paper type etc. This is the really tricky part. As an example, in summer it takes from 10 to 30 minutes in full sun for the right exposure. You will have to try, and try again and again. If you pass that step, you already have won.
After that step, the paper will look solarized. The only developing element we will use is water. Just put the sheet of paper in water in a tray for a few minutes. you can add a few drops of vinegar to help accelerate the reaction for the blue to appear quicker. Then wash the cyanotype in running water for a few more minutes.
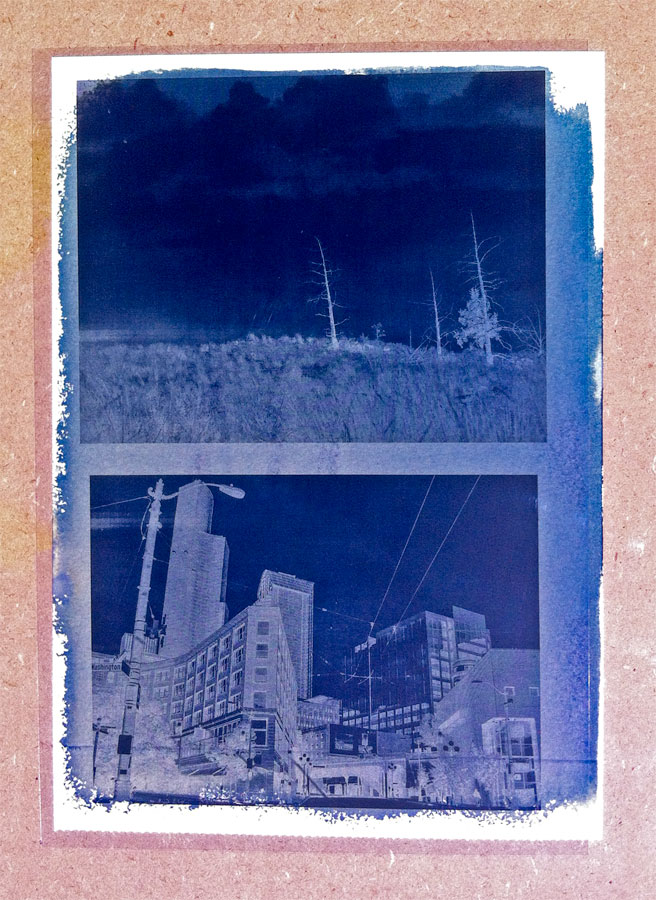
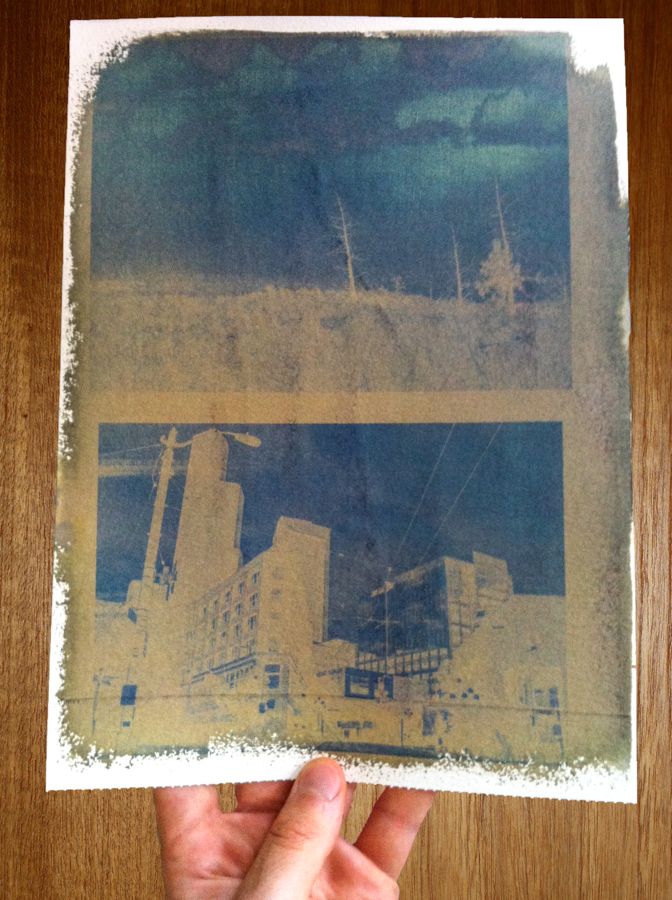
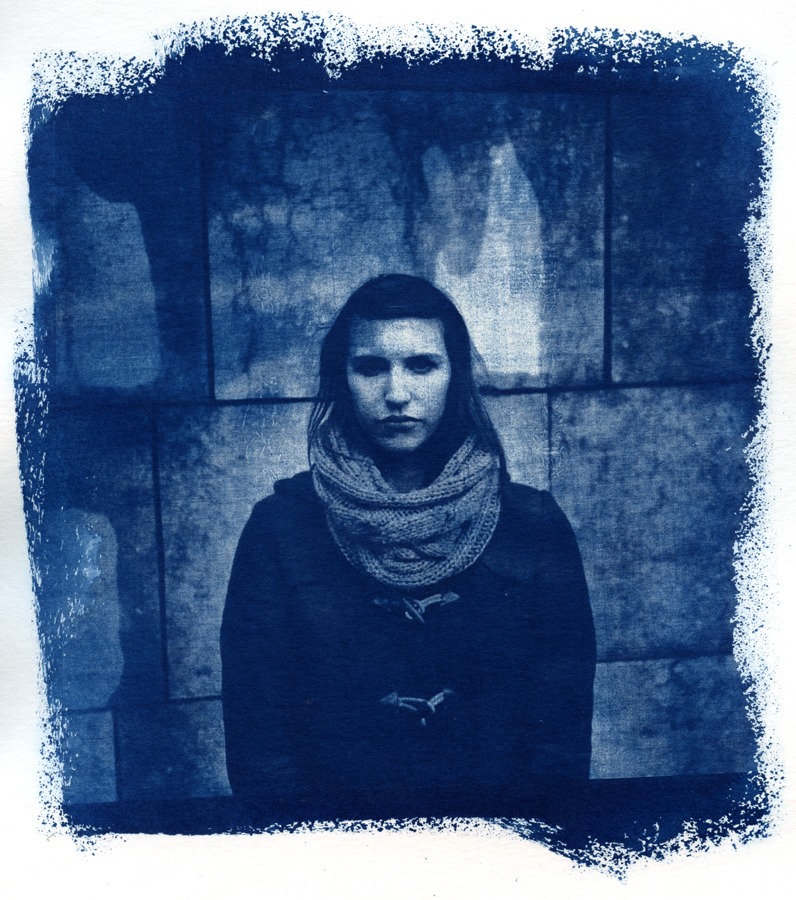
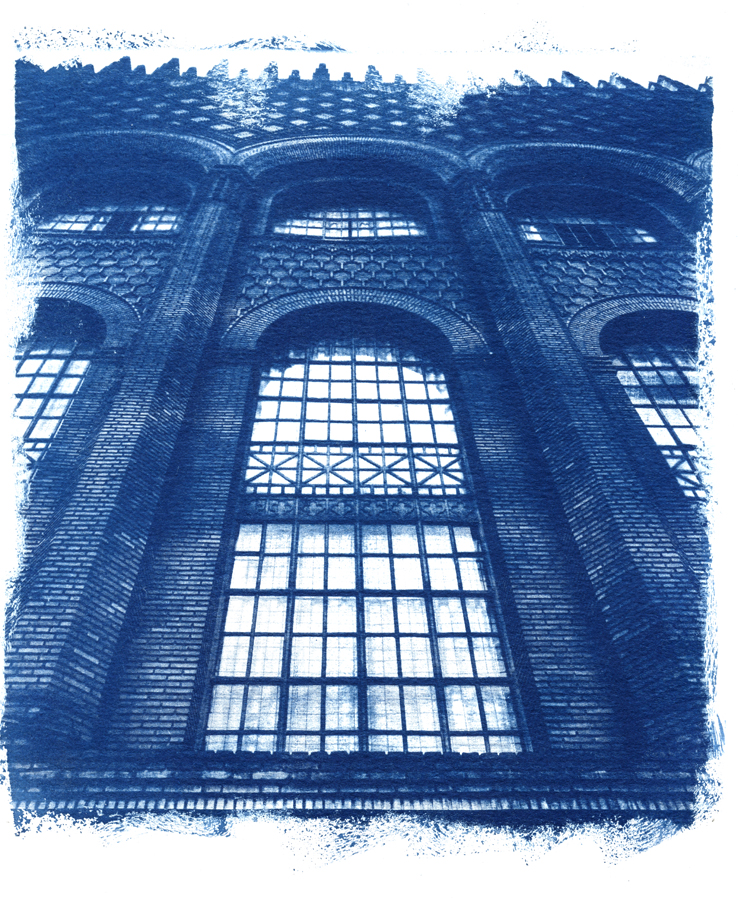
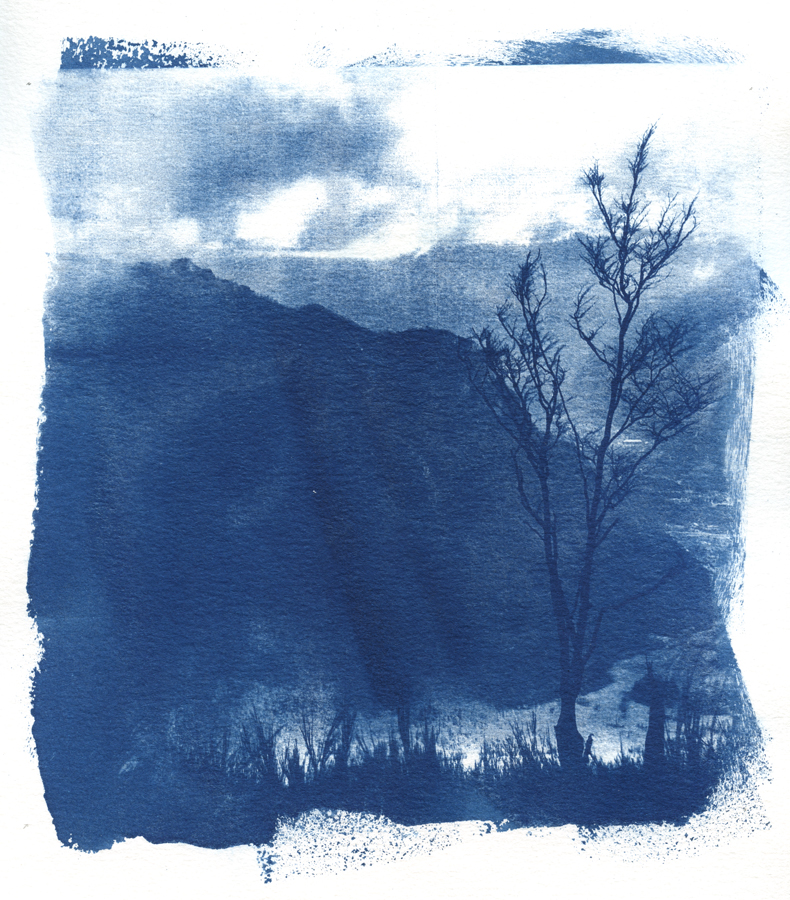
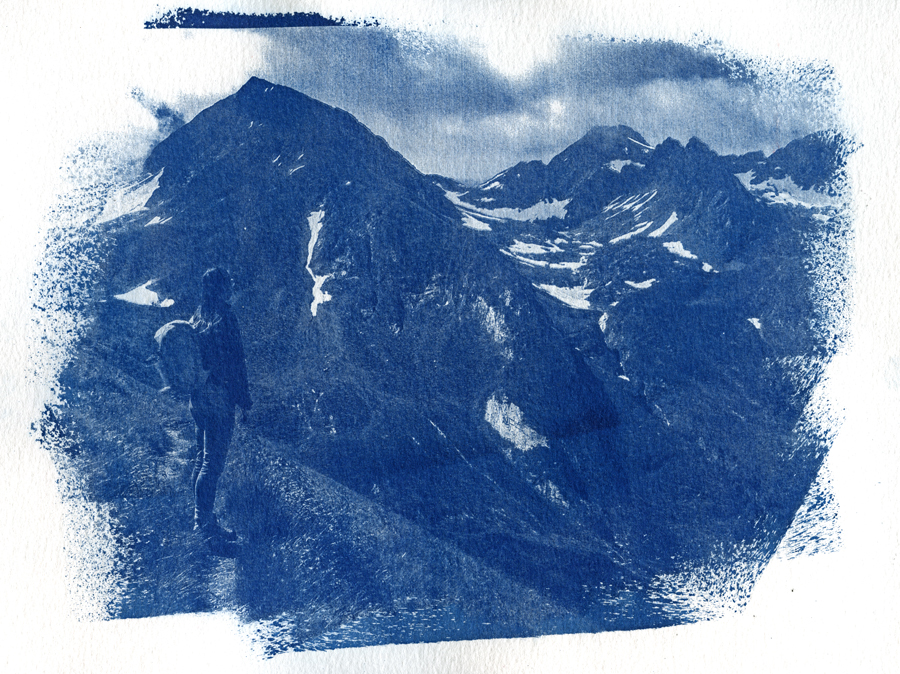
There should not be any more yellow stains on the paper when you take it out. Blue will be pale but it will get stronger as it dries. If you have little patience, you can add a few drops of hydrogen peroxide in the last bath. The blue will appear instantly and retain the same deep color as it dries. Here are a few of my first results printed on watercolor paper.
The next evolution will probably be making a UV bench, with UV bulbs. Summer sun is more than enough but the results are difficult to reproduce. I also made a few tries of toning with different types of tannin. I will post my successes and failures and — God willing, maybe in a few years, share more pictures.